DIY: How to Create a Cut-out Breastplate Necklace
- Annie Jo

- May 11, 2020
- 8 min read
Updated: May 12, 2020
Hello everyone!
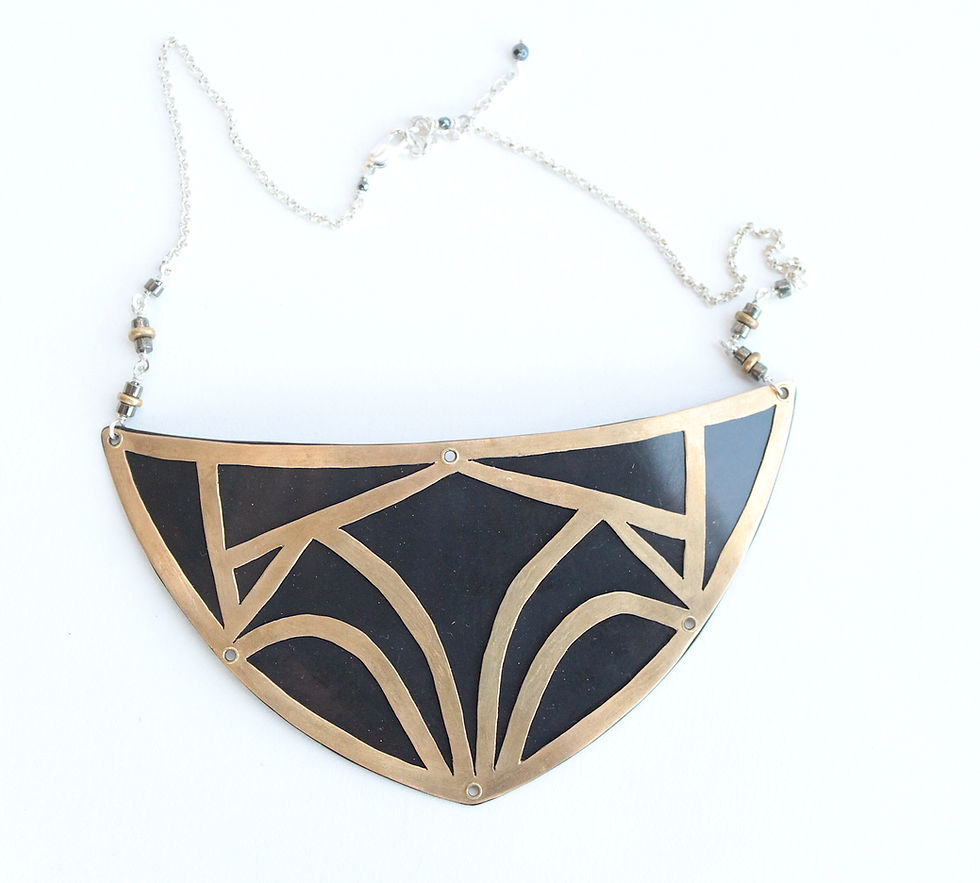
So I really love this style of necklace, I even have one that I've kept for myself. I will show you all how its done!

Materials:
-brass sheet metal
(front piece- not too thick a gauge or you may break a lot of saw blades, and not too thin or it will be too fragile and possibly sharp)
-copper sheet metal
(can be a bit thicker and studier since it is the back piece and the support for the brass cut out metal)
-jeweler's saw and blades
-drill bit lubricant
-punching tool (I actually use a screw)
-drill or dremel and small drill bits
-fine wire cutters
-a set of jeweler's round nose and flat nose pliers
-small brass tubing
(if you want your design to be very fine and detailed then you'll probably want very fine tubing)
-small doming tools
-liver of sulfur
-plastic or glass container
-metal files and sandpaper
-bench pin
-tracing paper
-fine tip permanent marker
-modge podge glue
-paintbrush or sponge
-scotch tape
-clear spray
-safety glasses
-hammer
-the rest of the materials to finish off your necklace
(chain, wire, beads, clasp)
So first things first, you need to draw out your design. I like to use the tracing paper and a fine tip permanent marker because its so much easier to get your design symmetrical and you want a permanent marker so that your design doesn't bleed when glueing it down. I draw half of my design and then fold the paper along the edge of my drawing and trace it onto the second half. Also tracing paper is quite thin and glues down really well to the metal. And don't worry about not being able to remove the Mod Podge glue, when you're pealing off the tracing paper, in the end it lifts all the glue off with it so I literally didn't have to clean the metal at all. I then use a paintbrush, but you could probably use a sponge as well, to apply a thin coat of glue to the brass sheet metal and then slowly set your tracing paper down and rub all the bubbles out from under it.
(ignore the other piece that I was working on simultaneously)

Now you'll want to find yourself a sharp nail or screw and use it to punch little dents into all the parts of your design that you'll be cutting out. It is so much easier to drill a hole in metal if you do this first, otherwise the drill bit seems to go skating around the metal and scratches up your piece. Make sure the screw/nail is large enough that you can hold it in place and hit the head of it with a hammer without smashing your fingers. Also don't punch your dent and plan on drilling on the line of your design or you will end up drilling out part of the brass that you want remaining. Now take your drill and drill bit and drill out all of the punched spots in all of the areas that you want to cut out. make sure to use some bees wax or a drill bit lubricant so you keep your bits happy and so they don't over heat. The drill bit can be as small or large as you want as long as your saw blade fits through it smoothly, and the larger the drill bit the more it catches the metal and will be more difficult to drill with, so keep that in mind. *** Also please ALWAYS wear your safety glasses when drilling!!

Now you're ready for that jeweler's saw and saw blade! And keep your safety glasses on! So I always secure the blade in the bottom part of the saw and then I thread the brass piece through before securing the top of the blade. Make sure your brass piece is facing upwards so you can see the design that you're cutting out. I started in the middle and worked my way out cutting out the shapes, but I don't believe it would matter where you start. This part will be much, much easier with a bench pin. Mine is literally just screwed directly into my jewelry desk. Sawing will go a lot smoother if you keep it at an angle and not straight up and down like I am below. You will also want to use that bit lubricant or bees wax on your saw blade for smoother sawing.
And yes I broke a saw blade while working on this piece.
Now Im getting to some of the outer designs that I want cut out. Every time you finish cutting out one section you will have to loosen the saw blade and thread it through the next drilled hole. Take breaks if your fingers and forearms get tired, if you try to push through a lot of the time you will end up loosing your grip and/or rushing which leads to broken saw blades and not so perfect saw lines.

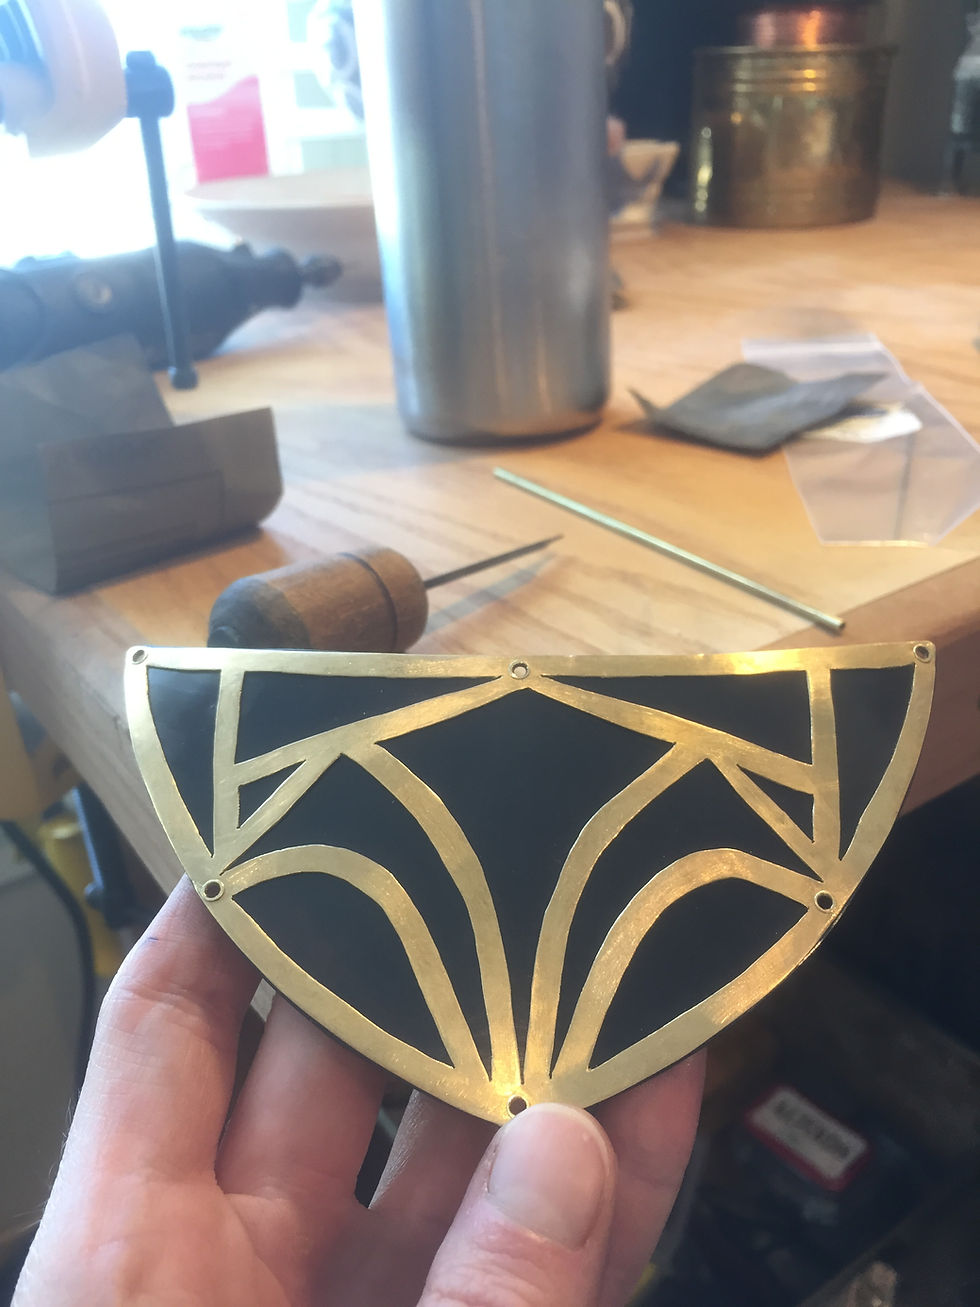
All finished sawing ! Now just peal off that tracing paper (notice how there is no glue stuck to the brass). Its time to begin filing and sanding all the edges, so get out your metal files and sand paper. Keep feeling the piece with your finger tips for any rough or sharp spots.
I also used a silicone polishing bit as well to get into some of those tight places. While using this bit I had my respirator on, I'm trying really hard to keep my health and lungs in mind.
Once you are done, trace the outside of your piece onto the copper sheet metal using your permanent marker and either saw it out or use shears to cut it out. Now file and sand all its edges.

Now its time to plan where you want all your rivets to secure the brass sheet metal onto the copper. Make sure there aren't any loose spots around the edges, and if your worried about your design catching in the middle areas of the cut out design, then you may want to even put some rivets in the center. Where ever you have planned to put in rivets, you need to use that screw/nail again and punch in some divots. To pick out a drill bit you need to see what size your brass tubing is. You'll want them to basically be the same size. When you have drilled out all of the holes on the brass piece you'll want to line it up on top of the copper back piece and tape them tightly together. I just used a normal scotch tape, if the tape is too sticky like packing tape or duct tape it might leave a sticky residue on your piece that will be hard to remove. Use the screw/nail and punch divots into the copper at the center of all the holes, then drill them out with the brass piece still on top. You really need these holes to line up so you are able to easily slide in the brass tubing. Once you are done drilling out the holes in the copper you can take it apart and clean up all the burs around the drilled holes by lightly twisting a larger drill bit over the hole. Make sure to check both sides of each hole on both the copper and brass pieces.
Its time to oxidize your copper! You don't need to do this if you are happy with the current look of the copper and brass contrast together, I just like the brass to really pop on top of the blackened copper. I use a liver of sulphur gel in a well ventilated area (it smells like rotten eggs), but you also want to be near a sink so I just do this all in the bathroom with the fan on. Make sure that your plastic/glass container is large enough for your copper piece to rest on the bottom, you'll need it fully submerged. Also you'll never want to eat out of this container again so don't use one of your food bowls/tupperware. Put in a drop or two of the liver of sulphur and then fill the container with hot water high enough for your copper to be covered. Soon as the liver of sulphur is dissolved and mixed fully throughout the water (to do this I just rock the container lightly back and forth) you can place in your copper piece. It will oxidize faster and more throughly if you agitate the liquid so I'll continue gently rocking the container back and forth a bit. After a few minutes I'd flip the copper piece over just to make sure there isn't any spots that are in contact with the container that aren't getting soaked. Keep doing this for maybe 10 or so minutes or until your copper has reached the desired darkness. Take out the copper piece and rinse it off and set on a towel to dry. (the black definitely can rub off onto the towel and stain it so make sure its one you don't care about. Once its dry you can gently rub some of the excess black off.
As you can see I had been putting off oxidizing my pieces and ended up doing this to many pieces that day.
You don't have to spray your piece, I just wanted the black to last and not eventually get worn off in places. This is the first time I'm using this enamel spray so if you have a better one in mind for spraying metal, use that and tell me about it!! When spraying on the thin coat, make sure to not get any drips. I did not spray the back of the piece, but do so if you'd like. I'm sure you all know this but only do this in a very ventilated area...probably outside.

Once the copper is dry bring it back in and begin sawing off your little tubing pieces to use as your rivets. To figure out how long you want your tubing pieces to be, just put them through the copper and brass and then add about a millimeter on top and bottom and that should work perfectly. If your tubing pieces are too long the walls will actually start splitting/tearing because there is too much metal that you're trying to roll over, if the tubing is too short then then there wont be enough metal to roll over and it will not hold the pieces together. Make sure to file and sand the ends of the tubing so that there will not be any difficult burs to remove later. Once you saw out all of your tubing pieces you'll want to gather your doming tools.
These are doming tools.

I only used the smallest 3 or 4 sizes, and you wont need the doming block at all. So I now take each tubing piece one at a time and just flair one side. To do this place the tubing upright on an anvil (or in my case, the solid steel head of a 12 lb dumbell) and use a hammer to lightly tap on the back of the smallest doming tool and slowly flair the tubing out. You only want to do this until the tubing will not fall through the holes on your copper and brass. Now line up your brass and copper pieces and place in that flared tubing with the flared end being on the bottom. Now place it on the anvil and lightly flair this side of the tubing until the tubing is wedged in place. Take one of the larger sized doming tools and go back and forth on both sides of the tubing and make sure that the rivets are flat and even. I will even sometimes use my hammer to lightly tap on both sides of the rivet to make sure all of the flared edges are down and will not catch on anything. Now do this with the remaining tubing pieces.

Your piece is almost complete!!! Now you can just attach a chain on with the wire and jeweler's pliers, and add some beads for that bit of extra detail if you'd like.


Comments